
One of my FAVORITE images ever! Taken by George Kontaxis in December.
http://www.bodyofartgallery.com
http://www.georgekontaxis.com
One of my FAVORITE images ever! Taken by George Kontaxis in December.
http://www.bodyofartgallery.com
http://www.georgekontaxis.com

If you are looking for a revolutionary fat burner which provides sustained energy for an entire day and which also works as a potent pre-workout booster, you need to check out 9mm and 9mm+P from Swat Fuel. I am not joking – prepare to be amazed.
I am not easily impressed by sports supplements because there are so many products out there that over-promise and under-deliver. However, I can honestly say that Swat Fuel 9mm and 9mm+P are unique and superior to any other thermogenic fat burners on the market. These products were originally formulated for law enforcement individuals and military personnel to specifically provide sustained stamina and energy which lasts the entire day and does not produce jitters. These products optimize fat metabolism and are excellent for use as pre-workout boosters to maximize your energy and stamina during your lift. Even if you don’t work out, you can count on these powerful formulations to increase energy levels without the usual jitters or crash that many thermogenics cause.
9mm is a powerful thermogenic and pre-workout formula, but if you are trying to lose weight or you want to become ripped, opt for 9mm+P which also contains a natural appetite suppressant.
Prepare to SWEAT LIKE A PIG during your workouts when you take these supplements! Also make sure to hydrate very well when taking either product. Even from the first time I took 9mm, my reaction was one of total surprise. As the sweat poured off me and I noticed that I had laser focus with my lift, I just kept saying, WOW. I was truly blown away, and I continue to be impressed by the fact that this product delivers true to its description.
Every time I take this stuff, I am drenched in sweat about five minutes into my lift. No other thermogenic has ever had this effect on me. What amazes me is that my heart does not race, I do not get the jitters, and my workouts are much more powerful than on the days when I don’t take it.
Go to http://swatfuel.com/solidfuel.aspx to order, and remember to enter discount code 1HOTHAPA for a generous discount at the time of your order. 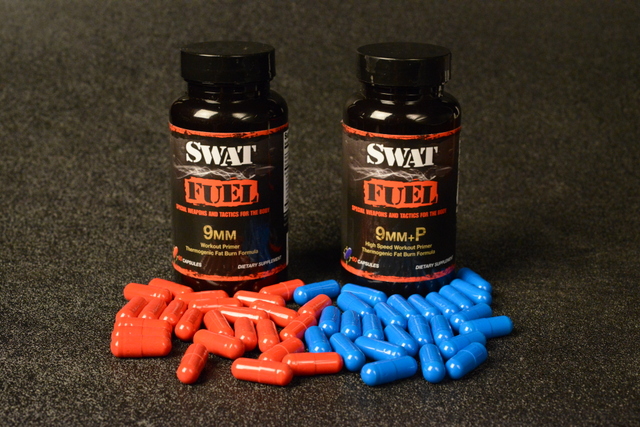
 The New Year has caused many new gym-goers to experience delayed onset muscle soreness (DOMS) which may have taken them by surprise. The sad truth is that many people will become so discouraged from experiencing DOMS (usually because they don’t understand why they are so sore) that they will back off from exercising after a brief effort at maintaining consistency. This is one time when welcoming the pain instead of running from the activity that caused it would be most appropriate!
DOMS develops between 24 to 72 hours after physical activity and is considered a normal and common result of activity that challenges muscle tissue. Small microscopic tears actually occur in the muscle fibers, and when coupled with localized inflammation, manifest as soreness. These aches and pains, provided they are minor, are a sign that your muscles are adapting to the activity which caused them to develop in the first place. Rather than shying away from physical activity in the long term, just take it easy for a few days until the pain subsides.
Stretching can speed up the process so that DOMS dissipates more rapidly, as does massage and application of heat and/or ice. Anti-inflammatories can be taken as well, though I tend to lean more towards natural forms such as curcumin and arnica. If the pain does not respond well to natural anti-inflammatories, you may want to take ibuprofen instead. I see a huge difference in the time of recovery in people who stretch when they are experiencing DOMS, as stretching helps to prevent muscle spasms in the affected area.
 With the New Year here, many people have either thought about embarking on or have already begun a weight training program in an effort to either shed excess pounds or improve their overall level of fitness. However, many people have little to no clue about how to split up their routines in order to maximize results while also avoiding overtraining.
Probably the best advice I can give to most people (with competitors the stark exception) is to train no more than four days per week. I also recommend that you weight train for one to two consecutive days, take a rest day, then resume weight training after the rest day. Competitors who are accustomed to hard training are on intense regimens which often include only one or two days of rest per week, which is part of the reason why they are more prone to overtraining.
If you are brand new to weight training, or have been away from it for many years, I recommend a three day full body split in which you will work the entire body during each workout. A good sequence is Mondays, Wednesdays, and Fridays, as is a Tuesday, Thursday, and Saturday sequence. This ensures at least one day of rest between workouts.
Three Day Full Body Split:
Monday – Full Body
Tuesday – OFF
Wednesday – Full Body
Thursday – OFF
Friday – Full Body
Saturday – OFF
Sunday – OFF
For those who are more accustomed to working out with weights, I recommend a four day split in which the upper and lower body are worked on separate days with at least one day of rest afterward. An example would look like this:
Intermediate Upper/Lower Four Day Split:
Monday – Upper Body
Tuesday – Lower Body
Wednesday – OFF
Thursday – Upper Body
Friday – Lower Body
Saturday – OFF
Sunday – OFF
Another variation is to split each upper body and lower body workout further so that different muscle groups are worked on different days:
Intermediate Upper/Lower Four Day Split Variation:
Monday – Chest, Shoulders, Triceps
Tuesday – Quads, Calves
Wednesday – OFF
Thursday – Back, Biceps
Friday – Hamstrings, Glutes, Abs
Saturday – OFF
If there is enough interest, I can provide sample routines which fall within the above split schedules. Simply post a comment on this post so that I know you are interested.
 Though I have modeled for the majority of my life, I didn’t become involved in fitness modeling until after I turned 43. As I approach my 47th birthday I realize more and more how intimidating and confusing it can be for an aspiring fitness model to navigate through the industry and know what will propel their careers instead of putting them on a path of wasted time, effort and money as they try to make themselves known. I truly wish I had a guide like this http://tinyurl.com/aoeabbr to help me when I was revamping my modeling career! This guide is INVALUABLE if you are serious about embarking on a fitness modeling career.
Many aspiring fitness models ask me questions about the best way to direct their efforts. Now there is a fantastic and comprehensive guide which takes all the guesswork out of the process. I am so fortunate to know the author of this guide and have worked with her on numerous projects over the years. She has been kind enough to extend an offer to my friends and clients which will save you all the headaches you could be dealing with if you do not have such a great guide to lead you on your path to fitness modeling success.
Click here http://tinyurl.com/aoeabbr to take advantage of this amazing offer, and remember to use code STACEYNAITO to get special pricing!
If you are ann NPC Bikini or Figure competitor, or you are THINKING about competing, please check out my newly launched contest prep site! I have a full menu of services, so if you just need assistance on posing, or if you need comprehensive coaching, I am here for you ladies! If you are new to competing, it is important to realize that a lot of details go into looking your best onstage:
PROPER TRAINING FOR YOUR BODY TYPE AND THE DIVISION
PROPER AND STRUCTURED MEAL PLAN
PROPER SUPPLEMENTATION
PROPER SUIT CUT AND COLOR
PROPER ACCESSORIES
APPROPRIATE STAGE MAKEUP
WELL APPLIED SPRAY TAN
On top of this there are countless other details which are easy to overlook if you are already overwhelmed with the pressure of competing.
I will guide you through the entire process so that you won’t need to worry about those little details. Programs are delivered via email so you do not need to live locally in the Los Angeles area.
 It’s no secret that fast foods are unhealthy and artery-clogging, but there are impostors which sit on grocery shelves and have people believe they are healthy due to phrases like “Low Fat”, “Good for you”, “Fit ____”, and the list goes on. I encourage my patients to read EVERY label on food containers while perusing the grocery store shelves and aisles and to become aware of preservatives, sugar, hydrogenated oils, artificial flavors and artificial colorings.
A good general rule to follow is if there are more than five ingredients on a food label, or if there are a bunch of big terms which seem alien and strange to you, chances are that the item has questionable nutritional value and should be avoided. Over the last few years I have developed such an aversion to packaged foods that as soon as I see a food item in a bag, box or can, I tend to avoid it.
An interesting thing begins happening to people when they completely eliminate sugars and processed foods from their diets. They experience increased energy, clearer skin, fewer aches and pains, and lower body fat. If someone has been eating clean for a while and decides to have a sinful treat like pizza, a fast food burger, chips, cake or cookies, he or she will notice a detrimental effect on energy, aches and pains may return, and stubborn pockets of body fat will become more noticeable. I have seen this in myself and cannot stand it. What always occurs with me after I have had a couple of glasses of wine, a piece of cake, or greasy foods is that my digestion is completely thrown off whack and I feel sluggish and achy. In other words, these heavier foods make me feel heavy and tired, while clean, light, fresh foods make me feel energized.
I understand that it can be challenging to find the time to eat whole foods each day, but I am telling you that it is well worth it if you intend to take control of poor eating habits and possibly even reverse disease processes in your body. Give it a try…you will probably love it.
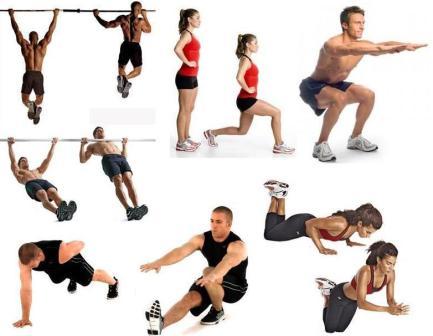
 People frequently ask me how they can exercise when they do not have gym memberships and also do not have any exercise equipment whatsoever, so I have designed the following full body routine with these people in mind. There is no equipment needed for this workout, but you should expect to break a sweat and work out intensely with this routine!
THE ROUTINE:
Squat into Side Leg Raise: stand with feet shoulder width apart. Squat down so that you are sitting back behind your heels with your back perpendicular to floor (if you need support, hold onto the back of a chair for balance). Come up from squat position, raising right leg straight out to side as you straighten up. Bring leg back to floor and return to squat position, then raise left leg straight out to side. Keep squatting then raising one leg out to side, alternating legs. Perform 10 to 12 repetitions.
Do not rest, but go immediately to:
Jump Squat: Get into squat position with feet slightly wider than shoulder width apart. Jump up, then return quickly back to squat position without resting. Perform 20 repetitions.
Do not rest, but go immediately to:
Front Lunges: Stand with feet close together. Take a big step forward so that back knee almost touches floor and front knee is bent at a 90 degree angle. Make sure knee does not go beyond your toes. Pause for 3 counts, then return to start. Repeat with other leg. Perform 15 repetitions.
* Repeat above sequence four more times for a total of five complete supersets.
Mountain Climbers: Start in pushup position with arms straight. From this position, lift right foot off floor and move right knee to chest. Return to starting position and repeat knee to chest move with other leg. Continue without stopping, alternating legs. Perform 15 repetitions.
Do not rest, but go immediately to:
Wall Pushups: Stand facing a wall with hands shoulder width apart on wall and your arms parallel to the floor. Place feet together about two feet away from the wall. Bend at the elbows and bring your chest toward the wall. Perform 15 repetitions.
* Repeat above sequence four more times for a total of five complete supersets.
Dips: Facing away from a sturdy chair, hands palms down on edge of chair and place legs straight out in front of you with heels on floor. Lower body to floor by bending elbows (keep elbows in and pointed straight back during movement) until butt almost touches floor, then return to start. Perform 10 repetitions.
Do not rest, but go immediately to:
Back Pushups: Start position is similar to traditional pushup, but place your forearms on the ground with your fingers touching, forming a triangle with your elbows. Bend at hip until butt is up in the air, with your torso and legs forming an upside down V. Slowly lower your chest toward your hands by bending at the elbows. Perform 15 repetitions.
* Repeat above sequence four more times for a total of five complete supersets.
Traditional Pushups: If you have problems supporting your weight on your toes, place knees on floor during movement. Perform 10 repetitions.
Do not rest, but go immediately to:
Arm Circles: Hold arms straight out to sides so that they are parallel to floor, palms down. Rotate arms in a circular motion from front to back at an approximately 12 inch diameter. Perform 20 repetitions, then switch motion so that you are rotating from back to front and perform another 20 repetitions.
Do not rest, but go immediately to:
Supermans: Lie face down on floor with arms straight out in front of you. Raise your arms while slightly extending the spine and raising your chest off the floor while also raising your legs off the ground so that both your arms and legs are several inches off the floor. Hold raised position for a count of five, then return to start. Perform 10 repetitions.
* Repeat above sequence three more times for a total of four complete supersets.
Calf Raises: Stand on a step so that your toes and balls of feet are on step and your heels drop below level of step. Hold onto something sturdy and raise up so that you are on your toes. Return to start. Perform 20 repetitions.
Do not rest, but go immediately to:
Toe Taps: Stand with feet about six inches apart. Raise up on toes and tap one foot, then the other, as if running in place while on your toes. Make sure to remain on your toes during the entire set. Perform 25 repetitions.
* Repeat above sequence three more times for a total of four complete supersets.
Planks: Start position is similar to traditional pushup, but place your forearms on the ground with your fingers touching, forming a triangle with your elbows. Make sure your torso and legs form a straight line with no arching, bending or sagging. Hold this position for 30 to 60 seconds, then relax.
* Perform four sets of this exercise.
Vertical Leg Crunches: Lie on floor and extend legs straight up in air with knees crossed. Place hands behind head for support. Contract your abdominal muscles to lift your shoulder blades off the floor so that chest moves towards feet without moving legs. Lower and repeat. Perform 12 to 15 repetitions.
* Perform three sets of this exercise.
Find original post at: http://www.rxmuscle.com/rx-girl-articles/6778-competing-on-a-budget.html
Several weeks ago I calculated the total amount which has been spent by my sponsors and by me on all costs associated with the half dozen national qualifiers and the thirteen pro qualifiers I have competed in since 2009, and almost fell over in my chair. I am by no means blessed with disposable income so I can honestly say that my drive to compete has required a tremendous amount of financial and personal sacrifice. However, I realize that many of you prefer to keep expenses to an absolute minimum, so I offer a number of suggestions on how to meet the financial demands of competing without putting undue strain on your wallet.
Fans
Friends and family
Business associates
Fitness clothing companies
Smaller supplement companies
The trick to asking for sponsorship is to graciously ask for assistance in paying for an event. Remember that even a small amount will help. I have competed at events which have been sponsored by a number of entities, with the tan covered by one, entry fee covered by another, flight by yet another, etc.
Make sure to apply a thin, even layer and allow to dry before applying the next layer. The number of layers you will apply will depend on your base skin tone and the brand of solution you decide to use, but you should plan on applying two to five coats of color.
As for the solutions which I consider the best for stage, I love Jan Tana High Definition Color and Liquid Sunrayz. Bronze Angel by Dream Tan is also great. Some people love Pro Tan so this brand may also work well for you. However, I personally cannot use this product as it fades immediately on me, hence my hesitation with this particular brand.
I hope these tips will enable you to compete at the shows you have your eye on! Best of luck!
