
Find original post at: http://www.rxmuscle.com/rx-girl-articles/6387-how-to-bling-out-your-own-suit.html

Most of us ladies love the dazzle of crystals and sequins when seen on competition suits, but such embellishments can be pretty expensive, especially when suits are custom made and crystallized by a professional suitmaker. However, it is possible to bling out your own suit at home as long as you have a somewhat creative hand and a lot of patience. I have endured the laborious process of applying crystals by hand on three suits. Despite the fact that this was very time-consuming, it was well worth it considering the fact that I saved hundreds of dollars by crystallizing the suits myself.
You may be wondering where to purchase a plain competition suit. Good sources are eBay, Jagware, Suits You Swimwear and Chynna Dolls, or you can have a suit made by a professional suit designer (examples are Passion Fruit, CJ’s Elite, TameeMarie) and then apply the crystals yourself. Once you have your suit, you can determine what design you would like to apply on the fabric. You can get ideas from looking at competition images of ladies in suits you like, or you can go to a site like www.Dreamstime.com and select a clip art image. After this is done you need to make a copy of the design so that it is the appropriate size for your suit, and also make copies of the mirror image so that your suit design is symmetrical. These prints will serve as templates when you are ready to start mapping out the design. If you are very artistic, you can sketch a freehand design.
The next step in the process is determining the colors, sizes and quantities of the crystals, beads or sequins you want to purchase for your suit design. Rhinestone Depot is an excellent wholesale online site for crystals. I also like Artbeads but the prices are higher. Make sure when you place your order that you order extra materials just in case some of the crystals pop off. Generally speaking, you should only purchase flat-backed stones as they are much easier to glue onto fabric and much less likely to pop off.
There are two options available to you with Swarovski crystals when you are trying to decide how to affix the stones to your suit. Swarovski crystals come in a “Hotfix” variety which already has adhesive on the back, but you will need to purchase the application tool (which looks like a soldering iron) in order to apply the stones. The other option is to get the regular flat-backed crystals and use a fabric glue such as E6000 or Aleene’s Flexible Stretchable Fabric Glue. If you are using very small stones, you should have a pair of small angled tweezers on hand to pick up the crystals. Other supplies to have on hand are toothpicks (for setting a crystal in the exact spot where you want it and for cleaning off excess glue) and a piece of sturdy cardboard large enough to stretch out the fabric in your suit while you are working on it.
To begin the process, line up the crystals on the design which you have printed out. This will give you a familiarity with the design and also ensure that you have enough crystals to create the design. You can also place marks on the fabric with a washable marker so you have some guidelines. Put your suit on the cardboard in such a way that the fabric is completely stretched out. KEEP FABRIC STRETCHED WHILE YOU GLUE RHINESTONES AND ALLOW GLUE TO DRY! If not, the crystals will pop off.
Start at one end of the design, placing a small amount of glue on the back of the crystal and then pressing into place. For smaller crystals, you can use angled tweezers and toothpicks to move the crystals into their exact spots. It is a good idea to switch back and forth from one side to another to ensure your pattern remains symmetrical.
Most importantly, TAKE YOUR TIME! This will take HOURS and HOURS to do. Trust me, it really takes a while. When I crystallized the peacock feathers on the suit I wore in 2011, it took me a total of 38 hours to complete the work. I had no choice but to keep returning to the project over a number of sessions until it was completed. Then again, there were over 3,000 crystals, so I created quite a challenge for myself.
Once you are finished, you can celebrate your creativity and rest in the knowledge that you have a one-of-a-kind suit!

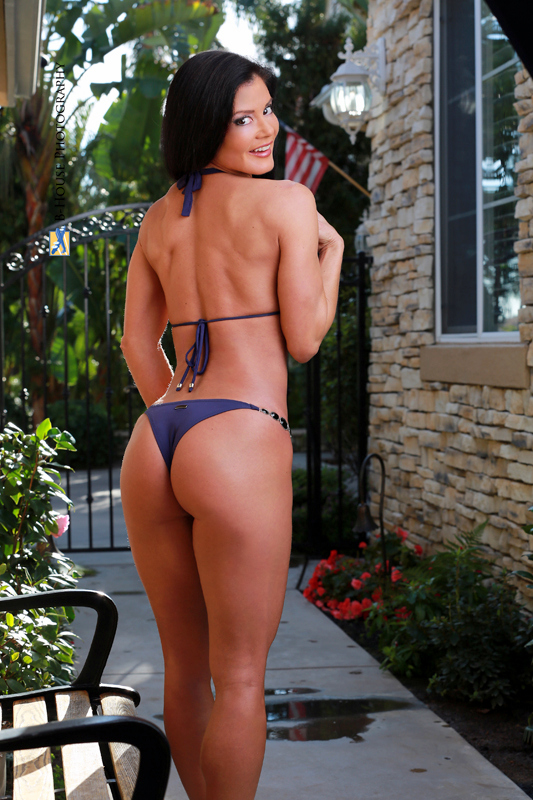
Taken by Ian Sitren of Second Focus Photography

For those of you who did not see my original post at http://www.rxmuscle.com/rx-girl-articles/6198-perfect-stage-makeup.html, I am re-posting here!
Perfect Stage Makeup
Let’s say you have decided to compete in your first contest and have already chosen your suit and accessories, booked your tanning appointment and, in an effort to keep costs down, decided to do your own makeup. If you have done stage makeup for other competitors then you most likely know what colors and techniques to use in order to avoid looking like a ghost onstage. However, if the extent of your makeup application skills has not ventured beyond bridal makeup and a nice going-out-on-the-town look, you might want to read on.
FOUNDATION:
First and foremost, the foundation you use needs to be DARK. I mean really dark. Generally speaking, the color on your face needs to be only a shade or two lighter than the color on your body after you get your spray tan. For those of you familiar with MAC Foundation colors, Studio Tech NW43 or NW45 are excellent foundation shades for the majority of competitors. However, I do not like MAC foundations because 1) they are extremely comedogenic, and 2) the compacts dry out very quickly. Instead, I use Bobbi Brown Stick Foundation in Warm Walnut and that works very well onstage.
Make sure to gently exfoliate your skin prior to the day of the competition, and use moisturizer and primer immediately before applying foundation. Though I usually use a foundation brush to apply foundation for photo shoots, when working with very dark foundations for stage I find that a makeup sponge works better than a brush in applying a nice, thin yet even layer. Make sure to extend foundation onto your neck, ears and hairline, feathering out and blending. Once this is done, dust some translucent setting powder over the foundation to set it. Chanel makes an excellent loose powder which I love both for daily use and for shows.
EYES:
Usually I will do my eye makeup first, then apply foundation since using a lot of black eyeshadow can often create a lot of dust which will ruin your foundation if you have applied it prior to your eye makeup. When choosing eyeshadow colors, avoid blues, greens and purples as they tend to look garish under the stage lights. Your best bet is to stick with neutral tones. You can never go wrong with a dramatic smoky eye. If you don’t know how to do a smoky eye, check out YouTube for some great smoky eye tutorials. Also check out the image in this article which shows a perfect smoky eye for the stage. Ideal colors to use for a stage-ready smoky eye are black, champagne or platinum, a beige base, brown and perhaps a warm pink.
Here are some guidelines for creating a smoky eye with the above colors:
Don’t forget false eyelashes! Finish off with liquid eyeliner and lots of mascara.
Make sure to also fill in your brows. I find that shadows work much better than pencils at creating a flattering look.
FACE CONTOUR:
Make sure to use a blush which is dark enough to show up on your face. MAC Dollymix is an excellent color for stage. I tend to extend the blush a bit into the side of the cheek below the cheekbone to avoid a hollowed out look, and will add a bit of bronzer to the blush when I do this.
Your contouring powder also needs to be dark, making MAC Deep Dark mineralized skin finish ideal for such a task. Apply contouring powder in an “E” on each side of the face, starting at the temple, then sweeping under the cheekbone and then along the underside of the jawline and under your chin. Make sure to blend well! A bit of highlighting powder also looks lovely when dusted lightly on the apples of the cheeks, forehead and chin, but be sure to use a light hand.
LIPS:
For your lips, choose pink or red matte shades. Avoid frosted formulas, oranges and corals as they do not translate well onstage. Also apply clear or pink lip gloss over your lipstick for a nice finish. Before you go onstage, make sure to blot the inner part of your lips with tissue to ensure that no lipstick ends up on your teeth.
IMPORTANT TIPS:
If you are nervous about how your makeup might look on the day of the show, practice your techniques until you feel comfortable. Also, make sure to give yourself enough time to apply your makeup on the day of the competition without feeling rushed. It is far better to start very early and have extra time to relax AFTER your makeup is applied than to be rushed and perhaps unable to complete your makeup application before stepping onstage.

Taken by the late and great Weiferd Watts…
