Originally published on RxGirl on Tuesday, 25 November 2014
http://www.rxmuscle.com/rx-girl-articles/11853-get-the-best-skin-ever-part-1-lifestyle-adjustments.html
“What skin cream do you use? Your skin looks amazing!”
This is a common exclamation from women who admire the flawless skin of those who are either naturally dermatologically blessed or have been proactive about practicing good skin care. Perhaps you are one of the blessed individuals, but most women deal with acne, wrinkles, oiliness, hyperpigmentation, dry skin and dark circles under the eyes, all of which can be addressed with targeted products. If you practice consistent skin care with the right products, you will see improvements in the tone and quality of your skin.
Before delving into topical products in Part 2 of this article, I will utilize Part 1 here to review the many variables which can dramatically influence the quality of the skin.
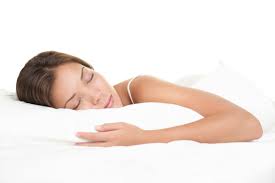
Sleeping Beauty –
There’s a lot of truth to the adage about getting one’s beauty sleep. When you get adequate sleep, you optimize your body’s ability to repair itself because it has a chance to release human growth hormone in the deep stages of sleep. Conversely, cheating yourself out of a good night’s sleep results in an increase in cortisol release, which increases the amount of inflammation in the body. Basically, the inflammation prevents your cells from repairing damaged collagen, and if this occurs chronically, your skin will adopt an aged appearance. So get some quality shut-eye every night!

Don’t smoke –
I know most of you ladies don’t engage in this habit, but if you do, bear in mind that the habit breaks down the collagen and elastin in your skin, aging you prematurely. Smoking also constricts the blood vessels in the upper layer (epidermis), which interferes with delivery of oxygen and other vital nutrients which are involved in cell renewal. Lastly, the constant pursing of the lips which occurs while puffing on a cigarette causes fine vertical lines (“smoker’s lines”) to develop around the mouth.

Internal antioxidants –
We have all heard of the benefits of daily antioxidant intake and how these nutrients boost the body’s immunity, decrease inflammation, and even improve cognition, so it shouldn’t surprise you that antioxidants also promote cellular repair in the skin as well. Make sure to incorporate foods and supplements which have antioxidants such as vitamins A, C, E, cofactors like CoQ10, and polyphenols like resveratrol in them.

Hydrate from within –
Drink plenty of water, and you will be rewarded with glowing, healthy skin. Every time I have told a patient who suffered either from dry skin or from stubborn acne to drink plenty of water, I have seen dramatic improvement in the quality of their skin after they began drinking at least three liters of water per day. Adequate hydration will ensure that toxins are flushed out of cells and the cells are filled with water.
Healthy fats –
One of the hazards of competing is the tendency for coaches to completely strip dietary fat from contest prep diets. What results is a gaunt, unhealthy, aged appearance in the face which looks terrible and just screams for dermal fillers. Rather than wreak havoc on your youthful appearance, why not keep healthy fats like avocado, MCT oil, coconut oil, olive oil, flax seed, almonds, cashews, and fish oil in your daily regimen?

Limit alcohol –
Alcohol is notorious for dehydrating the skin and for that reason alone should be ingested in moderation. Also, since alcohol is toxic to the liver, it impairs the body’s ability to remove other environmental toxins which will be reflected in the quality of the skin. And for those of you who suffer from rosacea, that relaxing glass of red wine with dinner is a big no-no because it will aggravate the condition.
Clean makeup brushes –
When was the last time you cleaned your makeup brushes? Makeup brushes should be thoroughly washed on a regular basis to remove product build-up, bacteria and oils. If you suffer from acne, you need to be especially diligent about cleaning your makeup brushes regularly. As a general rule, clean foundation and concealer brushes at least once a week (twice a week if acne is a major issue). Eye makeup brushes should be cleaned every two weeks, and other brushes should be cleaned monthly. There are some excellent brush cleaning solvents, but you can mix one part baby shampoo with four parts water for an excellent and cheap brush cleaner.
Sanitize cell phone –
Cleaning your cell phone on a regular basis is a good sanitary practice to adopt, and can also save your skin from acne breakouts and rashes. Think for a minute how much you touch your phone and how much dust, ear wax and fingertip residue can accumulate on its surface. It’s no surprise that putting this bacteria- riddled device next to your cheek can cause skin flare-ups to occur. The best way to clean your phone is to use a soft cloth which is lightly sprayed with a dilute isopropyl alcohol solution (equal parts iso alcohol and water).
Stay tuned for Part 2 of this article which will cover topical products and treatments for luminous, youthful skin!
Originally published on RxGirl on Monday, 08 September 2014
http://www.rxmuscle.com/rx-girl-articles/11509-waxing-or-threading.html
These days there are many different hair removal methods available, including tweezing, shaving, depilatories, laser procedures, waxing and threading. Many women opt for one of the last two methods mentioned because they are inexpensive and produce relatively long-lasting results. Both waxing and threading have also become so convenient that it is commonplace to see waxing & threading services at nail salons and in malls. As a matter of fact, the threading place I go to is located in a nearby mall.
What’s the difference between waxing and threading?
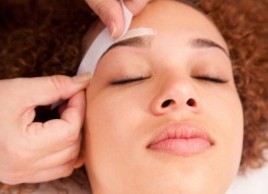
Waxing involves the application of wax (usually hot) in the direction of hair growth, after which a strip of cloth is pressed into the treated area then pulled off rapidly. Those of you who have seen The 40-Year Old Virgin might remember the waxing scene, which pretty much captures and amplifies the painful experience. If you are considering waxing, I can assure you that unless you are as hirsute as Steve Carrell’s character is, you won’t experience nearly as much discomfort.
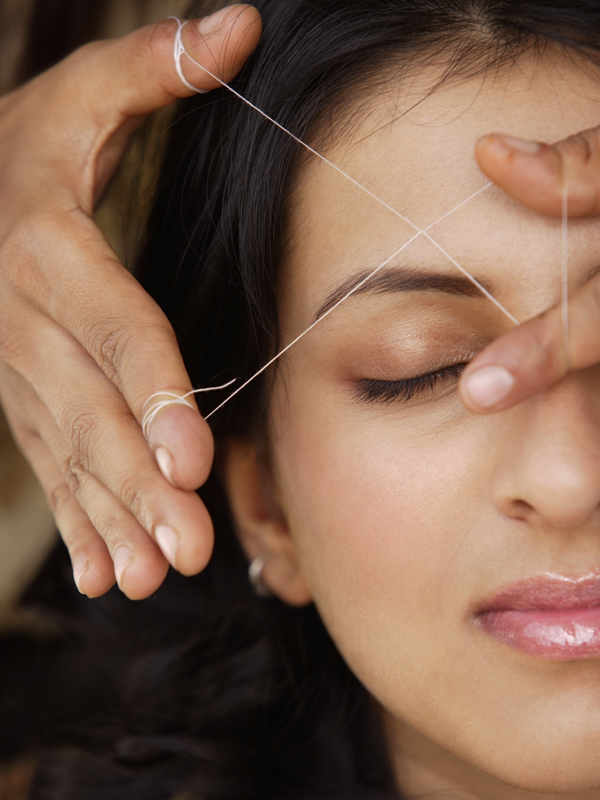
Threading, in contrast, involves thread which is looped around itself and then wound around the technician’s fingers, then rolled over the areas of unwanted hair, plucking the hair rapidly. If you are considering threading solely because you want to escape the discomfort of waxing, you may be in for a surprise, because threading can be a bit intense as well.
Nevertheless, I think it is well worth the discomfort to endure hair removal methods which can last at least a couple of weeks. Let’s look in more detail at the two different methods and how they stack up against each other.
What I love about waxing:
Waxing is great if you have dense, coarse, thick hair which tends to grow quickly, because the results of waxing tend to last longer than any other method. And since the process is so quick, the discomfort is easily forgotten. Another plus with waxing is that it tends to derange the hair follicles, resulting in impeded hair regrowth.
What I don’t like about waxing:
Waxing can be very messy, and because of that, imparting a precise eyebrow shape can be very difficult to achieve. Another negative is that the hair needs to be at least ¼ inch long before it can be waxed, which means plucking or shaving in the interim are general no-no’s. The wax used can be allergenic, triggering acne flare-ups, rashes, burns and abrasions. If you have extremely reactive or sensitive skin, waxing is not a good option. I also am not keen on the idea of the way that the wax tugs at the skin, causing inflammation and redness which can linger.
What I love about threading:
Threading shapes the brows beautifully, making me a fan right out of the gate. I also love the fact that I don’t have to wait for my hair to grow in before I go in for my next threading treatment. There are no gels or substances applied to the skin, so there is almost no risk of skin reactions from threading.
What I don’t like about threading:
Threading can be quite painful in more sensitive areas like the upper lip. Another limitation is the fact that threading is only done on the face, whereas waxing can be performed on just about any body part.
My personal experience:
I used to have my brows waxed regularly for many years, and put up with the swelling and redness which would persist for days at a time. I also developed rashes on my brow line on several occasions, but toughed it out because I didn’t want to give up waxing. Then I went through two particularly distressing incidents involving my upper lip which prompted me to switch to threading, and I haven’t returned to waxing since.
The first incident occurred when I had a sudden breakout on my upper lip after waxing. Normally I will get one acne blemish at a time, but approximately 24 hours after I had my upper lip waxed, one cystic zit and two whiteheads magically appeared, and of course this was just in time for a photo shoot! This did not deter me from having my upper lip waxed again, but I became very wary of the method. About two months later I returned to have my upper lip waxed, and got a nasty and painful abrasion right above the corner of my mouth immediately post-treatment. I was so upset about it that I finally decided to ban waxing from my regimen.
Once I tried threading I was pleased with the complete lack of skin irritation, and I was amazed at how precise these ladies were with the thread. One caveat is that though threading tends to be very precise, one threader overplucked and trimmed my brows and made them nearly pencil thin, and another threader recently plucked a couple of critical hairs and now I have a little bald spot that I am growing out. Just like with any technician, once you find someone whose style you like, you are best off sticking with the same person so you don’t get any surprises. Expert threaders can be very precise and can make the procedure pain-free.
Though threading is usually quite tolerable, it can hurt like mad, especially in more sensitive areas like the upper lip. During one visit, which happened to be right before my monthly visitor, the pain was so unbearable that I had to stop the treatment on my upper lip. I really mean it when I say it was worse than waxing, because the pain was prolonged. Before I send you ladies scurrying away from threading, I think you will be fine if you simply avoid doing threading right before your period. You can also try a numbing cream or spray beforehand to dull the pain. Generally speaking, most women tolerate threading in the brow area with minimal to no discomfort.
Obviously, there are reasons why both waxing and threading are so popular. It’s a good idea to try both methods to see which one works best for you. However, if you have sensitive skin, you might want to opt for threading since it doesn’t involve application of substances which may irritate the skin.

Originally posted on RxGirl on Sunday, 17 February 2013. The original post was published with white text on white background, so the only way to read it on the site is to highlight the text. To make things easier for everyone, I have copied and pasted the article here for you to read.
With so many ladies vying for top placings at NPC local and national shows, a primer on how to pose is essential. When I serve as trophy girl at Jon Lindsay’s contests, I notice a lot of girls who do not have a clue on how to pose and who clearly do not know how to display their hard-earned physiques to their best advantage.
I have broken down posing essentials by division, describing each mandatory pose as well as transitions. I also STRONGLY advise you to do the following:
1. Watch videos on YouTube of competitors who have done well at competitions at your level, whether it be local or national.
2. Practice, practice, practice! Schedule regular practice sessions so that you are comfortable with walking, posing and doing comparisons. Practice IN YOUR SUIT AND HEELS in front of a mirror! It makes a huge difference when you pose in the outfit you will be wearing onstage. You will be able to see the lines of your body when you practice in your suit and the heels will shift your center of gravity as well. In addition, you will be able to break in your shoes before contest day. It is also helpful to have someone shoot some video footage so that you will have feedback on how you look when you pose.
FIGURE:
With the Figure Division, the steps taken are very small and the hips are kept level in an effort to preserve the competitor’s symmetry. Figure poses are defined by a close foot stance.
Quarter Turns = Mandatory turns, front, sides and back. In side posing there is a slight torso twist. Make sure to hold each pose for two seconds (“one one thousand, two one thousand”).
FRONT: Feet and legs together, can turn toes out and turn knees out slightly to accentuate quad sweep. Keep hips slightly bent, stretching out abs, lifting chest out and engage your abs and quads. You will also flare out your lats. Arms will be out to side and forearms and hands graceful and relaxed.
SIDE STAGE RIGHT: Feet and legs together. You will twist your torso slightly toward audience while keeping a slight bend at the hips. Place front arm slightly behind you and back arm in front of the body and make sure those hands are graceful! Engage those abs! You will be looking stage right and NOT at the judges, but be sure to smile and keep your chin up!
BACK: Stand with feet and legs together with your bodyweight shifted onto your toes. Stick your butt up and out to smooth out your hams and glutes, and tighten your hamstrings and glutes. Whatever you do, do NOT squeeze your glutes together or you’ll enhance ripples and other imperfections back there. Make sure to engage your entire back and flare your lat region while also keeping shoulders extended to sides to enhance their caps. Tighten upper arms with a very slight bend in the elbow, but also keep forearms and hands relaxed and graceful, with your hands within a few inches from your hip line. If you have long hair, you will need to move it to the front so that you can display your back fully.
SIDE STAGE LEFT: Feet and legs together. You will twist your torso slightly toward audience while keeping a slight bend at the hips. Place front arm slightly behind you and back arm in front of the body and make sure those hands are graceful! Engage those abs! You will be looking stage left and NOT at the judges, but be sure to smile and keep your chin up!
TRANSITIONS: Transitions are even more difficult to master as they should look graceful without losing your body lines as you do so. You can transition one of two ways:
1. Step slightly forward and to the right with your left foot, slightly crossing in front of right foot. Pivot one quarter turn to the right on your left foot, then plant right foot into next pose.
2. Step to the right with your right foot, then pivot body one-quarter to the right as you step with left foot and then hit your pose.
With both methods, you need to make sure that the arm which faces the audience should be held behind you slightly so that you are not covering the side of your body. This is also known as “opening up” the arm.
STANDING ON THE DIAGONAL: You will stand at the diagonal with a slight twist to the waist so that your upper body is angled more toward the audience while your lower body is angled towards the center of the stage. Make sure to hold the arm that is close to the audience out to the side so that your body lines are visible. Your other hand can rest on your hip. Also make sure that no matter how you stand that your competitor number is visible! The entire time, you should be keeping everything tight and smiling!
BIKINI:
The Bikini Division is defined by larger steps and a shifting of weight onto one hip during the front pose and turns in order to increase the illusion of an S-curve. The standard front and back poses involve a wide stance with feet wider than shoulder width apart.
Half Turns = mandatory turns, front and back. Make sure to hold each pose for at least two seconds (“one one thousand, two one thousand”).
FRONT: Stand with feet wider than shoulder width apart and angle one hip slightly back. This increases the S-curve in your torso. Stretch out abs, lift chest out and pull shoulders back. You can place your hand on the hip that is angled back, while the other arm can hang gracefully at your side.

BACK: Stand with feet shoulder width apart or wider and stick your butt up and out to smooth out your hams and glutes. I always tell my contest prep clients to think of themselves as cats in heat, with their butts high up and an exaggerated curve in the low back to emphasize the roundness of the glutes. Whatever you do, do NOT squeeze your glutes together or you’ll enhance ripples and other imperfections back there. Your upper body must be completely upright – do not hunch forward! Most girls will place their hands on their anterior thighs for extra stability while holding this position.
Another position which is very popular in this division is to stand with one foot crossed in front of the other, while popping that butt up in the air.
TRANSITIONS: The cleanest bikini transitions are similar to a salsa pivot turn.
1. Step forward with the leg that is further back on the stage.
2. Step slightly forward with the other foot and pivot to the other side so you are facing to the side of the stage. In other words, if your first step was with the left foot, you will step with your right foot and pivot to the left so you are facing stage left. When you transition from front to back, pop your butt out towards the audience to enhance its fullness.
3. You will then do a two step sequence so that your feet land in your next pose stance.
STANDING ON THE DIAGONAL: This is the same as for Figure.
This is not meant to be a full primer but is designed to provide basics for ladies who are new to competing in figure or bikini. I always stress the importance of watching videos because they yield valuable information on how to pose.
Now get out there and strut your stuff!
Originally published on RxGirl on Friday, 04 January 2013. The original post was published with white text on white background, so the only way to read it on the site is to highlight the text. To make things easier for everyone, I have copied and pasted the article here for you to read.
http://www.rxmuscle.com/rx-girl-articles/7293-help-my-face-is-falling.html

An inevitable consequence of the aging process is the loss of elasticity in the skin that we often take for granted when we are young. This loss of firmness is amplified by competition diets and training which can trim storage fat stores to the point that female competitors’ faces look positively skeletal. My eye is trained to scan a person’s face for areas of lipoatrophy, elastosis, rhytids, shifting of malar fat pads, etc….in other words, sunken, sagging, drooping, wrinkled skin. The degree of elastic breakdown and loss of soft tissue fullness that I see in an average fifty year old is something I commonly see in many female competitors as young as their late 20’s. This process only gets worse over time unless the competitor is willing to do something to prevent progression.
What can a competitor do once her skin has started this dreaded sagging process?
There are laser treatments available which help to resurface and refine the skin and which can also tighten the skin somewhat. However, these treatments are often too expensive for competitors, especially when considering all the costs associated with competing. Another viable and cost-effective solution to the issue of loosening skin is a chemical peel. There are many different types of chemical peels available, ranging from very light glycolic acid peels to an aggressive TCA (trichloroacetic acid) peel. One composite peel (phenol, TCA, salicylic acid and Retin-A) which is my personal favorite is the Vi-Peel which is well tolerated, painless, and confers a good tightening effect on the skin.
Another wonderful option to correct the loss of volume in the face and add structural support is fillers. There are a number of hyaluronic acid based fillers available now (Restylane, Perlane, Juvederm, Belotero) which last 6 months to a year. Radiesse is another natural filler option which is comprised of calcium hydroxylapatite. Radiesse also acts as a biostimulator, stimulating cells in the skin to produce collagen over time. Another wonderful feature of Radiesse is the fact that it lasts 18 months or more.
If you have wrinkles in the forehead and around the eyes, Botox and Dysport are excellent treatments and will last for 3 to 6 months.
If you are in the Los Angeles area, I offer filler and Vi-Peel treatments. Please go to my medical website for more information: http://www.staceynaito.com

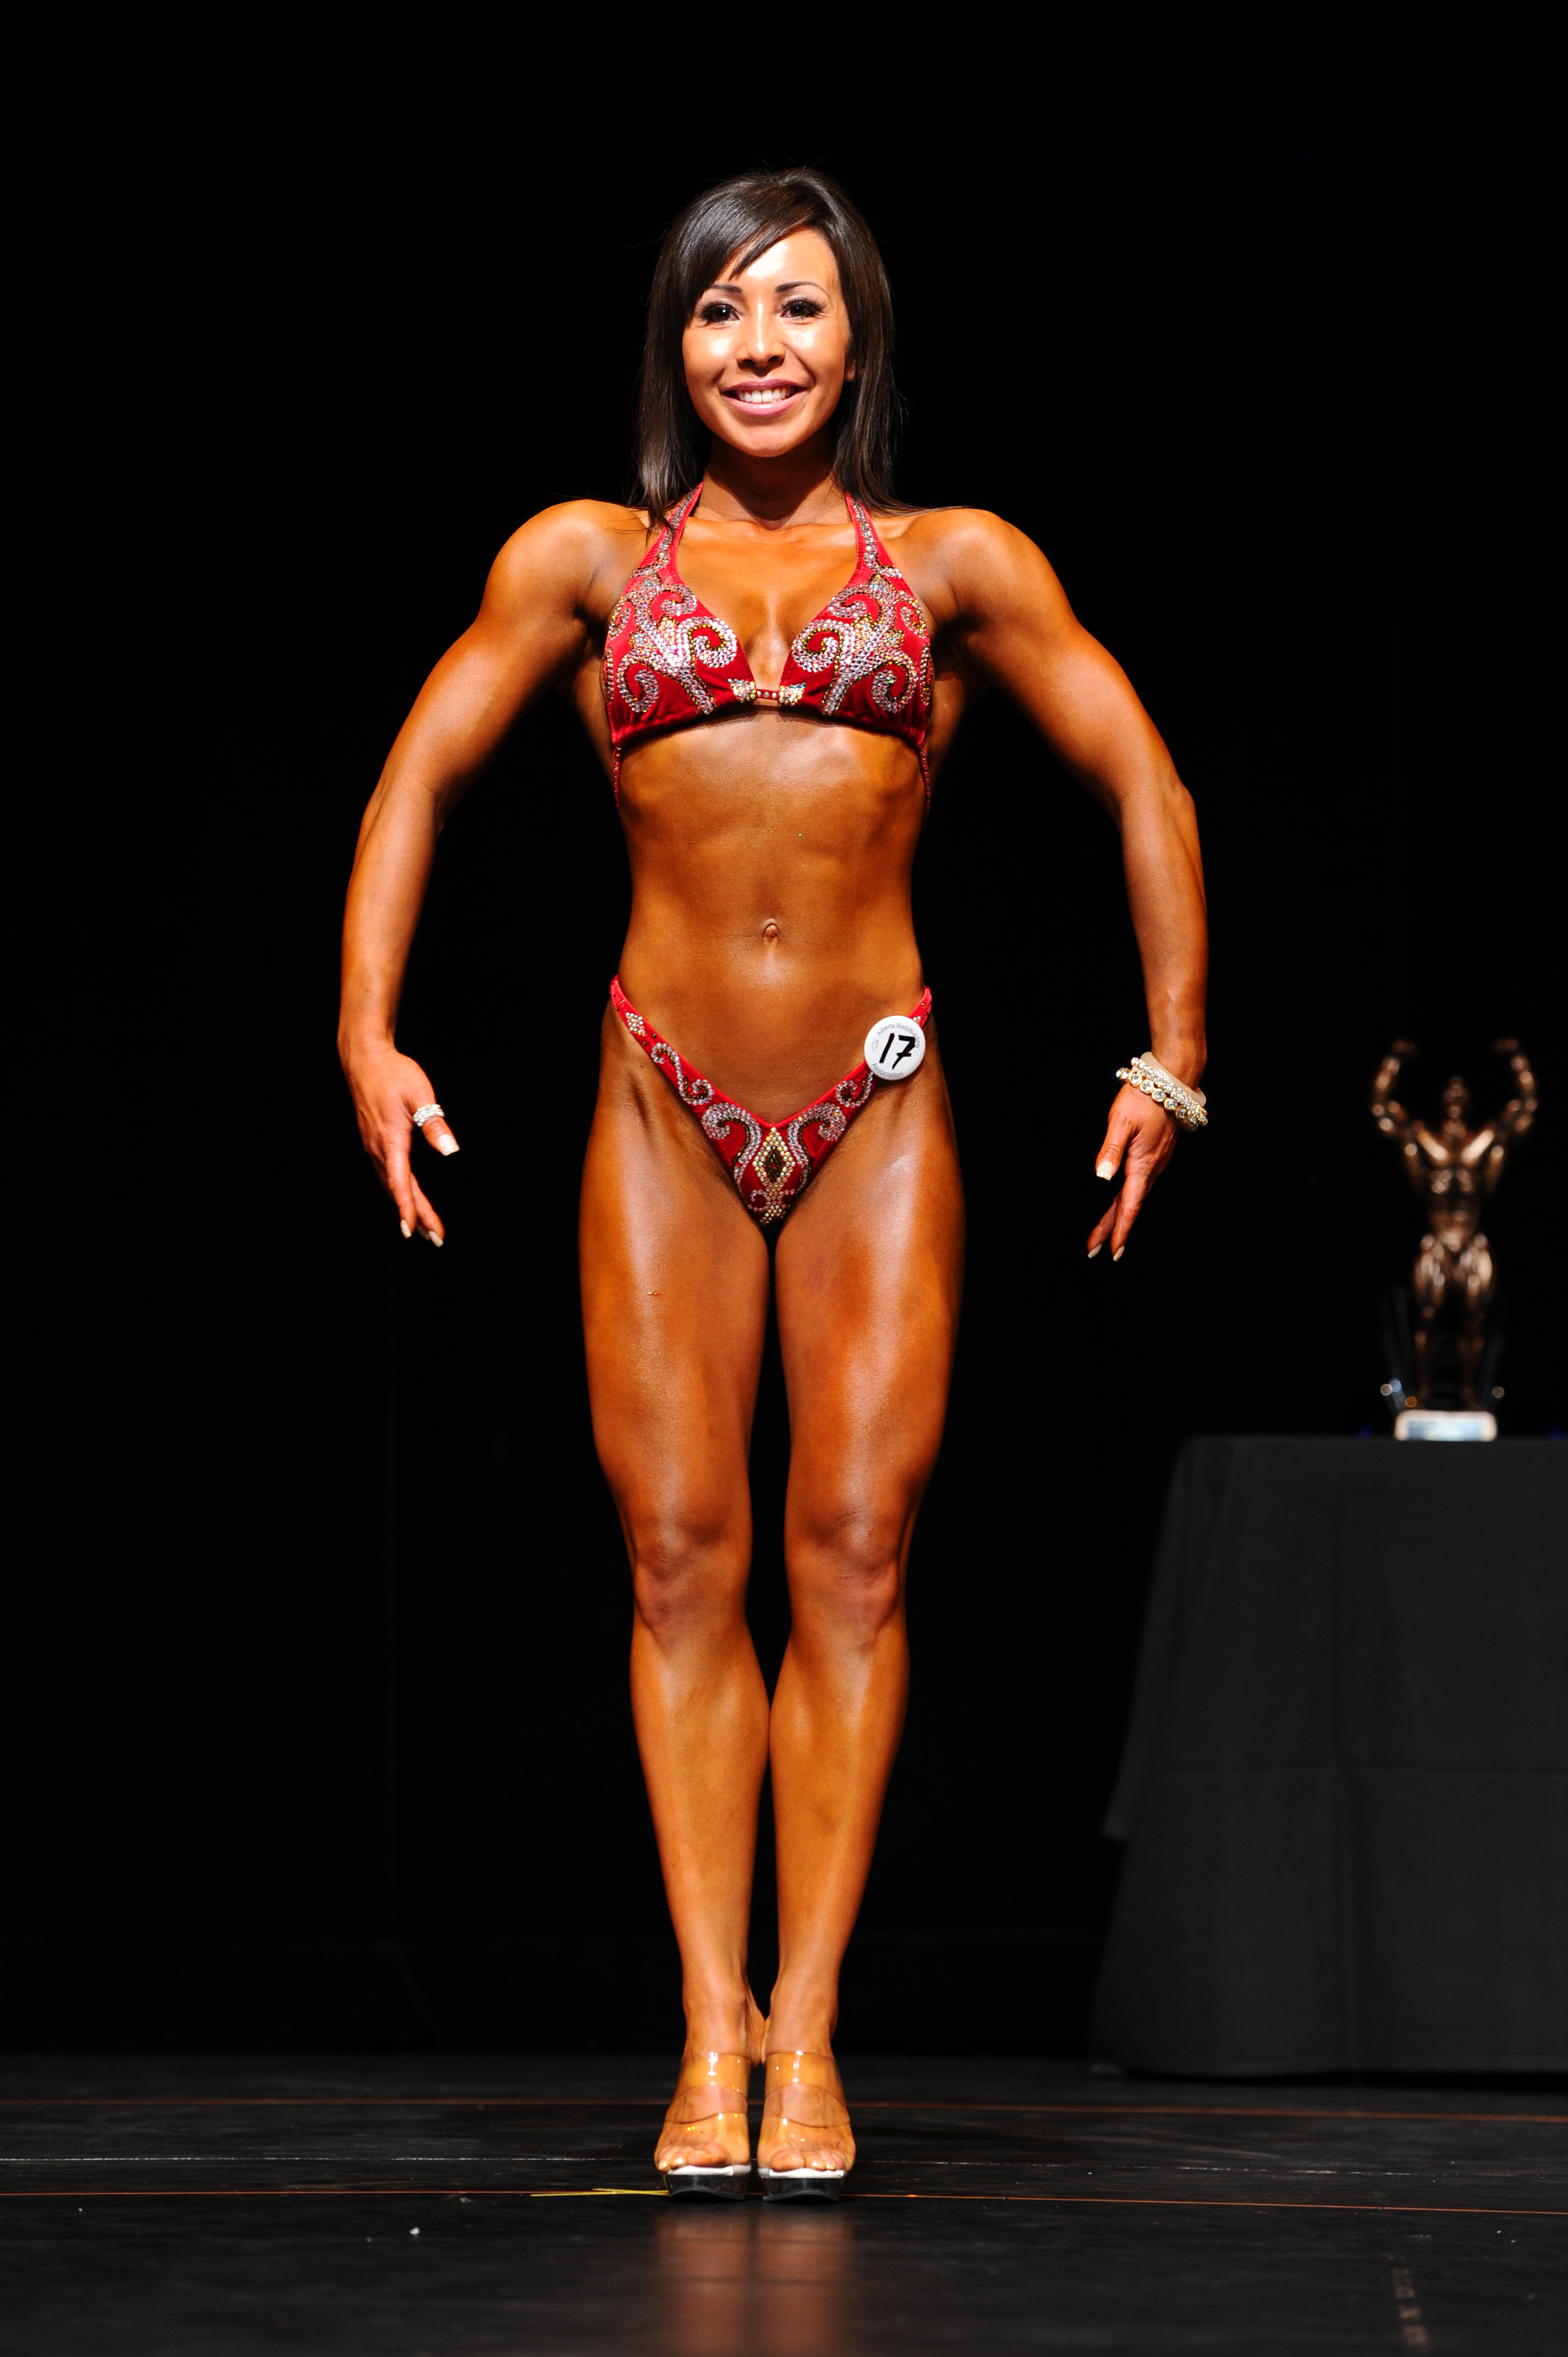
This was from IFBB North American in Cleveland, Ohio in 2012. I hadn’t seen this image until now! That was an amazing contest for me, in which I took a First Place Finish in Open Bikini C, beating out 27 other young ladies. I was 45 there!

The titles here aren’t completely correct here. I was the Over 35 B Champion as well, with a First Place finish to complement my Over 40 B First Place finish and my Overall Title in Over 40, but because I had already won my Pro Card, Second Place finisher Lindsay Oxford got her Pro Card as well. I guess that is why they decided to make it sound like Lindsay Oxford had won her class.

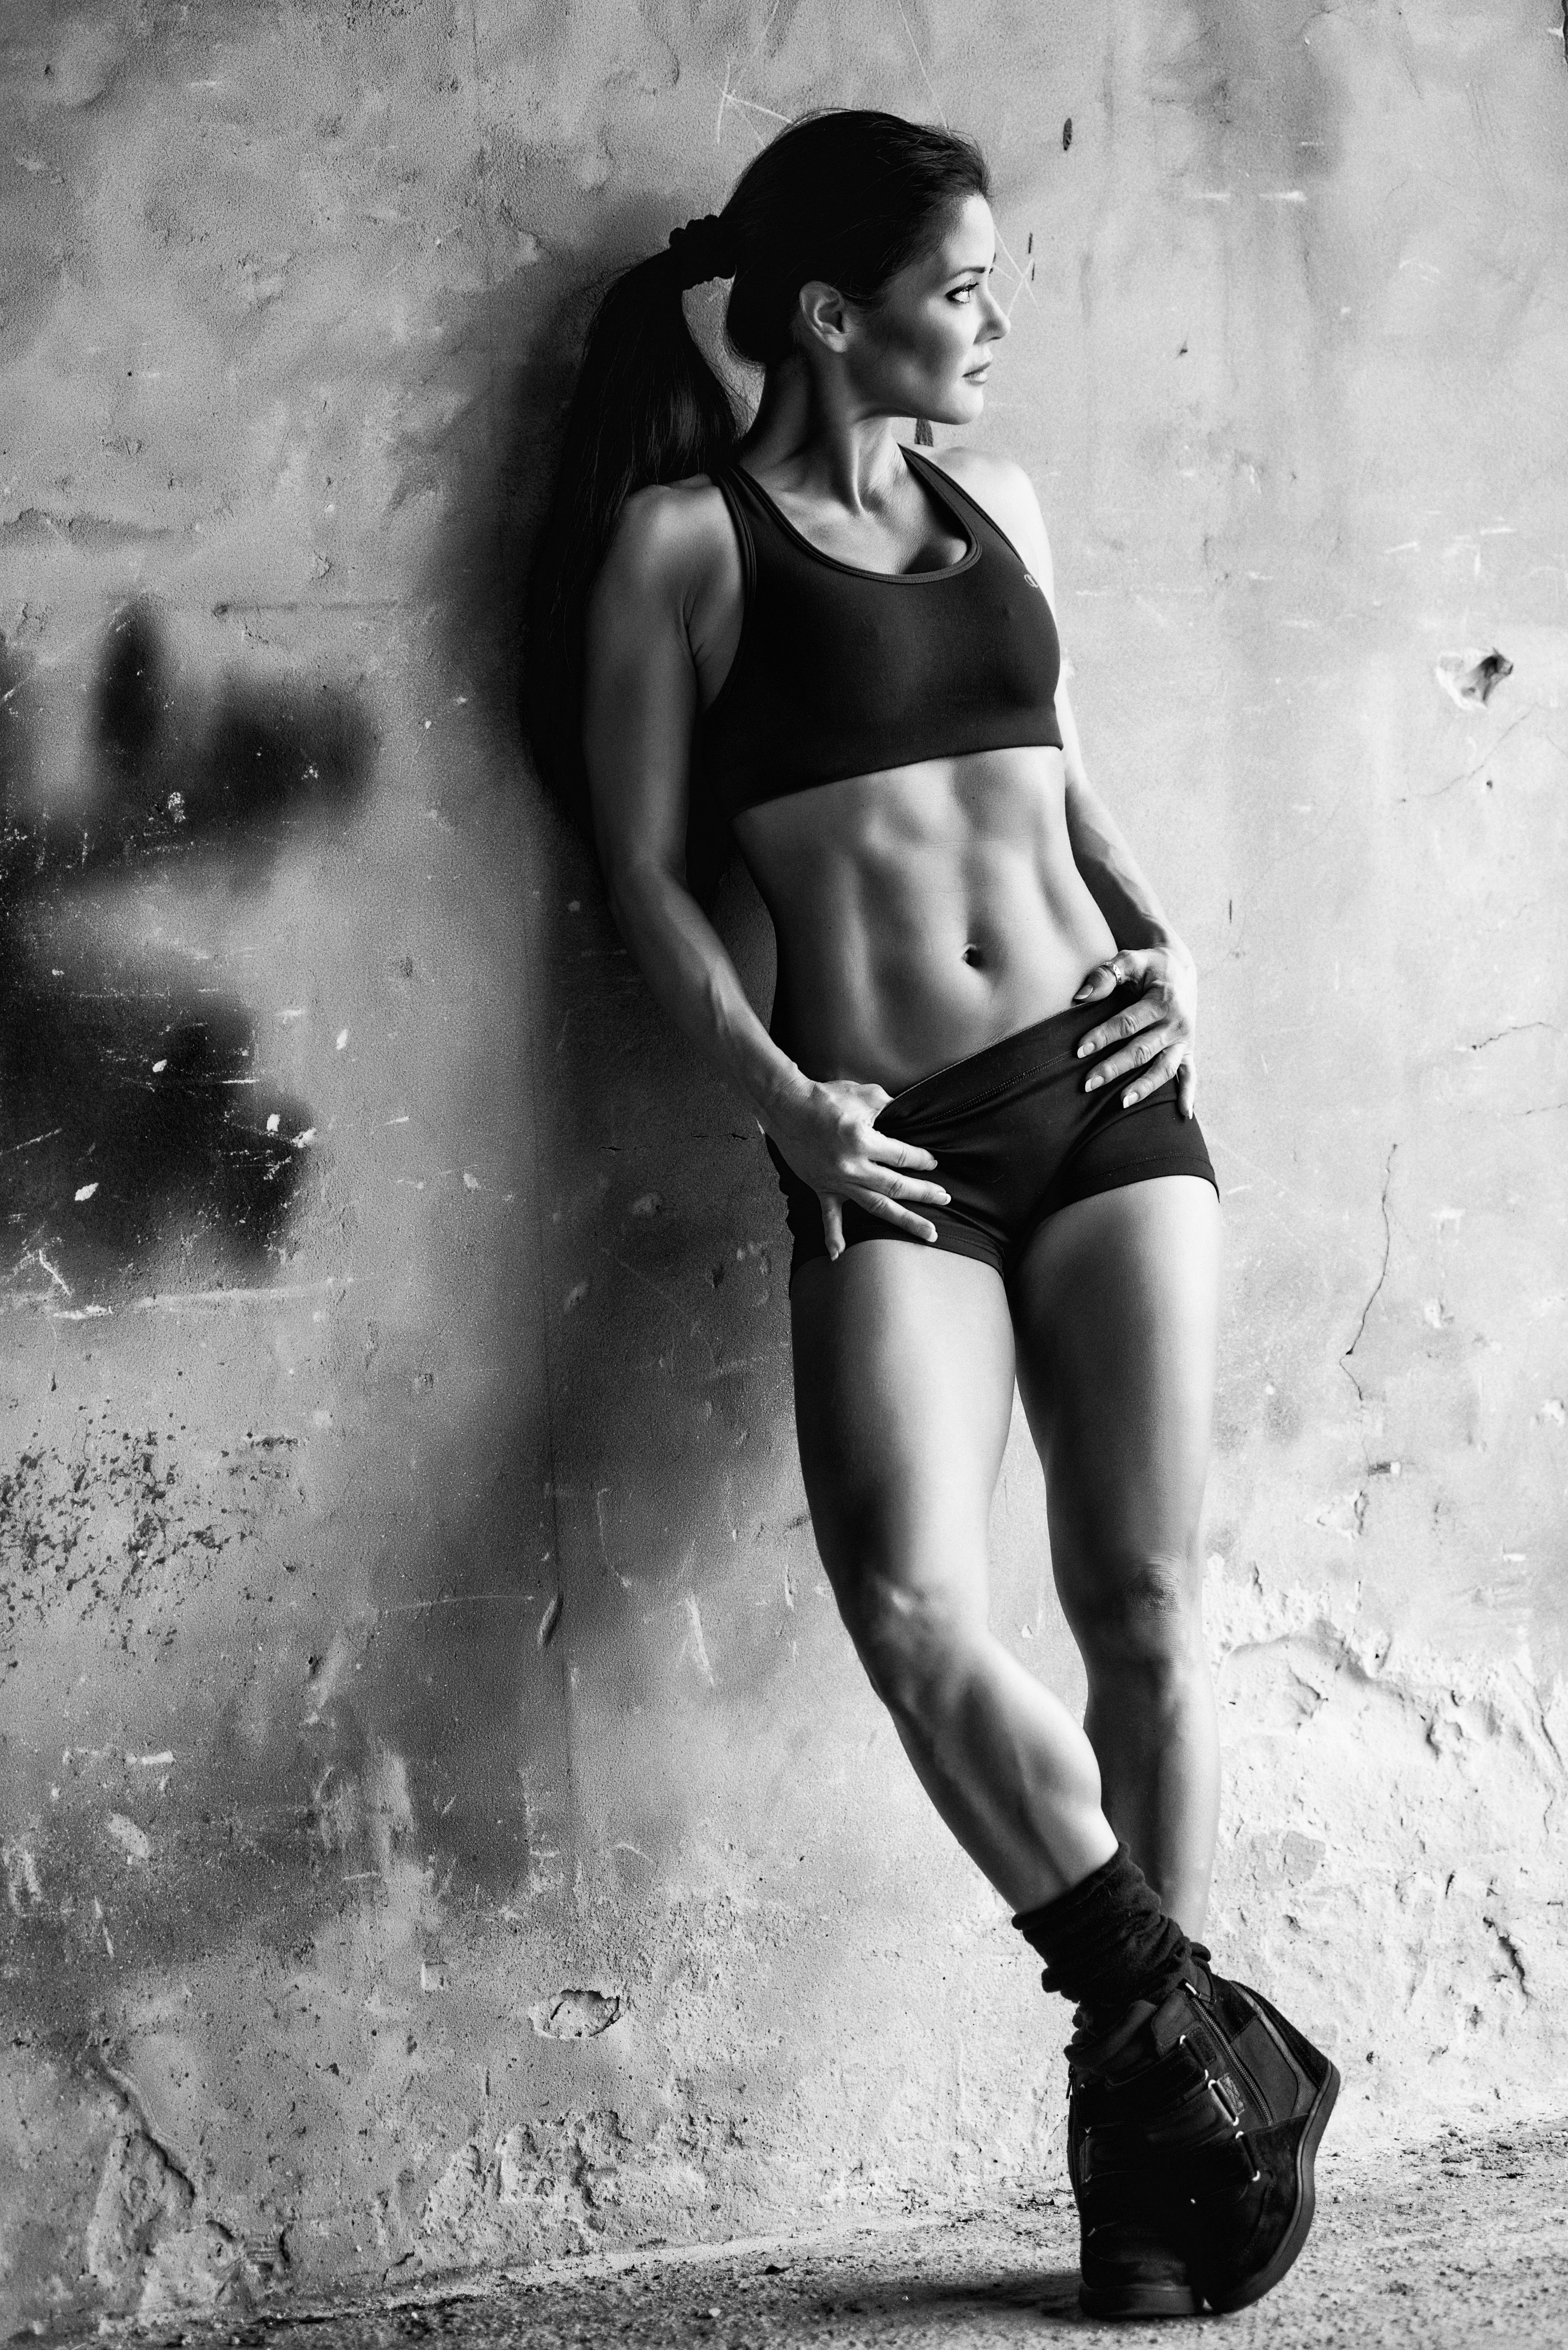
I believe this was shot in mid 2011 out near Las Vegas. It’s one of my favorite images!
